-
Welcome to 4Runners.com!
You are currently viewing as a guest! To get full-access, you need to register for a FREE account.
As a registered member, you’ll be able to:- Participate in all 4Runner discussion topics
- Transfer over your build thread from a different forum to this one
- Communicate privately with other 4Runner owners from around the world
- Post your own photos in our Members Gallery
- Access all special features of the site
 Wireless Car Play
 I need a super white paint stick, suggestions?
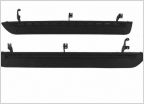 Fit of Toyota Running Boards Black (Trail Edition) PT938-89100?
 2021 Toyota 4 Runner Gas Cap Lock with key
 Air injection wire pulled away from clip!
 FitcamX - SD Card issue?
Washerfluid reservoir relocation on Gen5 ?
Discussion in '5th Gen 4Runners (2010-2024)' started by 4RunnerElk, Aug 10, 2017.