

-
Welcome to 4Runners.com!
You are currently viewing as a guest! To get full-access, you need to register for a FREE account.
As a registered member, you’ll be able to:- Participate in all 4Runner discussion topics
- Transfer over your build thread from a different forum to this one
- Communicate privately with other 4Runner owners from around the world
- Post your own photos in our Members Gallery
- Access all special features of the site
 Running Boards 2024 Limited Don’t Come Out Far Enough
 Molle panel attachments?
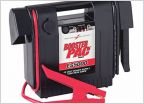 Requesting advice for best portable battery/jump for 2020 Toyota 4-Runner TRD Pro?
 Does Dash Usb provide 5.5v or 1.5A for dash cam?
 Suggestions for new hitch for ORP
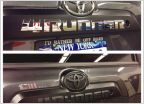 Black out logos
Plastic trim rubbing off paint
Discussion in '5th Gen 4Runners (2010-2024)' started by Juuba, Sep 24, 2023.
Page 10 of 10
Page 10 of 10

