1. Welcome to 4Runners.com!

    You are currently viewing as a guest! To get full-access, you need to register for a FREE account.

    As a registered member, you’ll be able to:
    • Participate in all 4Runner discussion topics
    • Transfer over your build thread from a different forum to this one
    • Communicate privately with other 4Runner owners from around the world
    • Post your own photos in our Members Gallery
    • Access all special features of the site

OEM 2020+ headunit with Apple Carplay / Android Auto into 2014-2019

Discussion in '5th Gen 4Runners (2010-2024)' started by Emmantik, Mar 31, 2023.

  1. Mar 31, 2023 at 7:46 AM
    #1
    Emmantik

    Emmantik [OP] New Member

    Joined:
    Dec 11, 2018
    Member:
    #8016
    Messages:
    383
    Gender:
    Male
    Vehicle:
    2015 Magnetic Grey SR5P
    Just making a quick post about adding a 2020+ headunit with Android Auto/Apple Carplay into a 2014-2019, specifically into my 2015 SR5 PREM with navigation, non-JBL. All you need is a headunit and a transplant harness. I know I could've gone aftermarket headunit but I like installing OEM as much as possible. The headunit I picked up was used so a lot cheaper than buying brand new from the dealer. Keep in mind you need a specific head unit depending on your model and what you are looking to purchase. In my case it needed to have navigation and be non-JBL. JBL models will have a slightly different install I believe. Auto Harness House can help if you have any questions.

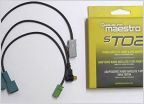
    I purchased the plug and play transplant harness from AutoHarnessHouse - Custom Car Stereo Wiring Kits. Here is the specific link to the product;

    Entune 3.0 Install kit for Toyota vehicles - Add Carplay

    Here is the headunit straight out of the box. In great shape except for a couple minor scratches.

    I am still waiting for the harness but I will update here once received and installed.

    20230328_164409_resized_1.jpg
     
  2. Mar 31, 2023 at 9:11 AM
    #2
    Squ1dward

    Squ1dward New Member

    Joined:
    Mar 27, 2023
    Member:
    #32018
    Messages:
    36
    Gender:
    Male
    good luck on the install. I did the Scion radio swap in my 2008 4R and autoharnesshouse had the right wires for it. I currently have a '19 and the previous owner installed a kenwood unit I really dont care for. I was thinking of going back to the stock unit. Where did you pick up your radio? Ebay or is there a more reliable place?
     
    This site contains affiliate links for which the site may be compensated.
    #2
  3. Mar 31, 2023 at 9:27 AM
    #3
    Emmantik

    Emmantik [OP] New Member

    Joined:
    Dec 11, 2018
    Member:
    #8016
    Messages:
    383
    Gender:
    Male
    Vehicle:
    2015 Magnetic Grey SR5P
    Yes I found it on EBay. They are hard to come by so I snatched one up with the requirements (non-JBL & navi) I needed right away. If they were more readily available I would have shopped around.
     
    This site contains affiliate links for which the site may be compensated.
    #3
  4. Mar 31, 2023 at 10:14 AM
    #4
    STrooper

    STrooper Let’s Go Places!

    Joined:
    Aug 21, 2021
    Member:
    #22926
    Messages:
    434
    Gender:
    Male
    First Name:
    Jack
    Vehicle:
    2019 4runner TRD Off Road
    Its cool you got the oem radio with the vents and hazard button!
     
  5. Apr 8, 2023 at 12:39 PM
    #5
    Emmantik

    Emmantik [OP] New Member

    Joined:
    Dec 11, 2018
    Member:
    #8016
    Messages:
    383
    Gender:
    Male
    Vehicle:
    2015 Magnetic Grey SR5P
    Just finished installing the headunit and everything works! The only thing I noticed is the hazard button works but does not stay on. Does anyone know anything about that?


    20230408_110247_resized.jpg
     
  6. Apr 8, 2023 at 3:37 PM
    #6
    kcdude

    kcdude New Member

    Joined:
    Aug 12, 2020
    Member:
    #16064
    Messages:
    37
    Gender:
    Male
    My understanding is that newer hazard buttons have slightly different profile setting in to the bezel. Didn’t your unit come with the hazard already installed? Why not just use it?

    I think all the T10 guys dealt with this and just did a quick wrap of electrical tape around the older plug to get it to seed in to the new bezel.
     
    Last edited: Apr 8, 2023
  7. Apr 9, 2023 at 8:52 AM
    #7
    Emmantik

    Emmantik [OP] New Member

    Joined:
    Dec 11, 2018
    Member:
    #8016
    Messages:
    383
    Gender:
    Male
    Vehicle:
    2015 Magnetic Grey SR5P
    So I fixed the hazard issue. Here's what I did in case anyone attempts this is in the future;

    This is to retrofit the old hazard button and surrounding trim bezel into new headunit trim.

    The first thing I did was remove the top black plate (only 2 screws on either side) and the 2 vents. The vents are just clipped in, no screws. Just need to release the tabs that hold it in. May not be necessary but I wanted more space to work.

    The trim bezel for the hazard button is plastic welded to the rest of the trim surround. I slowly drilled these 6 points to help release the bezel, making sure I don't drill all the way through. I have circled said points in the pics but should be obvious when looking at it.

    hazard1.jpg

    hazard2.jpg

    hazard3.jpg
     
    Last edited: Apr 10, 2023
    STrooper likes this.
  8. Apr 9, 2023 at 8:54 AM
    #8
    Emmantik

    Emmantik [OP] New Member

    Joined:
    Dec 11, 2018
    Member:
    #8016
    Messages:
    383
    Gender:
    Male
    Vehicle:
    2015 Magnetic Grey SR5P
    The older bezel does not fit exactly into the new head unit trim. Some filing is required to make it fit through opening.

    hazard4.jpg

    hazard5.jpg
     
    Last edited: Apr 9, 2023
    STrooper likes this.
  9. Apr 9, 2023 at 8:55 AM
    #9
    Emmantik

    Emmantik [OP] New Member

    Joined:
    Dec 11, 2018
    Member:
    #8016
    Messages:
    383
    Gender:
    Male
    Vehicle:
    2015 Magnetic Grey SR5P
    The last part is to swap over the harness. This is necessary as the plug connectors for both hazard buttons are shaped differently.

    hazard6.jpg
     
    STrooper likes this.
  10. Apr 9, 2023 at 8:57 AM
    #10
    Emmantik

    Emmantik [OP] New Member

    Joined:
    Dec 11, 2018
    Member:
    #8016
    Messages:
    383
    Gender:
    Male
    Vehicle:
    2015 Magnetic Grey SR5P
    As a side note, it may be a good idea to glue/tape the replacement bezel in place as not to fall off. I did not have to as I found it pressure fit enough to stay in place. Your results may be different.
     
    Last edited: Apr 10, 2023
    STrooper likes this.
  11. Apr 3, 2024 at 11:58 AM
    #11
    smperkin

    smperkin New Member

    Joined:
    Apr 3, 2024
    Member:
    #39579
    Messages:
    2
    Gender:
    Male
    I'm new to the board had a couple of clarifying questions on this type of upgrade... Hopefully someone knows the answers! For background, I'm waiting on my harness to arrive from AutoHarnessHouse.com so that I can plug in my new Entune 3.0 system - from a '21 non-JBL w/ Nav - into my '15 4Runner (non-JBL, with nav). I wanted to try and keep the OEM look, so I decided to go this route.

    1. I'm not clear on why this hazard button is a "thing" as part of this upgrade? The Entune 3.0 HU that I am planning to install has a hazard button "built into" the HU, between the two air vents. It's already recessed and simply needs to be plugged in from the harness. Am I missing something?

    2. The new HU I was able to get is grey, but the rest of the dash trim is high-gloss charcoal. I was planning on using a product like this to make it match the rest of the dash trim... Any thoughts?

    Thanks everyone!
     
  12. Apr 3, 2024 at 12:08 PM
    #12
    Lc200

    Lc200 Member

    Joined:
    Jun 16, 2023
    Member:
    #33430
    Messages:
    492
    Gender:
    Male
    Vehicle:
    Pre Facelift SR5P
    If your head unit comes with the hazard switch already attached, all you need to connect it is the wiring harness.
    You can use the black overlay, they are all Chinese made and their fitting ranges from very bad to almost OEM. I do not like them personally.
     
  13. Apr 3, 2024 at 12:30 PM
    #13
    smperkin

    smperkin New Member

    Joined:
    Apr 3, 2024
    Member:
    #39579
    Messages:
    2
    Gender:
    Male
    Awesome, thanks! Do you know of a black overlay that will fit "almost OEM"? There are a bunch out there and I'm not quite sure which one to order.
     
  14. Apr 3, 2024 at 1:08 PM
    #14
    Lc200

    Lc200 Member

    Joined:
    Jun 16, 2023
    Member:
    #33430
    Messages:
    492
    Gender:
    Male
    Vehicle:
    Pre Facelift SR5P
    They are a trial and error. There are a few threads where other members have applied them and added links. Search eBay too.
     
    This site contains affiliate links for which the site may be compensated.
    #14
  15. Apr 3, 2024 at 1:58 PM
    #15
    STrooper

    STrooper Let’s Go Places!

    Joined:
    Aug 21, 2021
    Member:
    #22926
    Messages:
    434
    Gender:
    Male
    First Name:
    Jack
    Vehicle:
    2019 4runner TRD Off Road
    Great job! @Emmantik. I was going to do exactly what you did by swapping the surrounding as its held by simple plastic welding. But, decided not going that route as the hazard button is not moving nor its making any rattling noises etc. I was however contemplating using a slim double sided 3M tape on the back of the button to hold it in place if it becomes an issue.
     
    Last edited: Apr 5, 2024
    Emmantik[QUOTED][OP] likes this.
  16. Apr 29, 2024 at 11:30 AM
    #16
    Jl0810

    Jl0810 New Member

    Joined:
    Monday
    Member:
    #40118
    Messages:
    1
    Gender:
    Male
    Does anyone have a link to a near OEM overlay they like for the hazard? I searched eBay and this forum but can’t find any links!
     
    This site contains affiliate links for which the site may be compensated.
    #16

Products Discussed in

To Top