

-
Welcome to 4Runners.com!
You are currently viewing as a guest! To get full-access, you need to register for a FREE account.
As a registered member, you’ll be able to:- Participate in all 4Runner discussion topics
- Transfer over your build thread from a different forum to this one
- Communicate privately with other 4Runner owners from around the world
- Post your own photos in our Members Gallery
- Access all special features of the site
 99 Tall coils on 2wd?
 Upgrade to LED Signals, Brakes etc...Inexpensively???
 Advice lifting a 99 4Runner
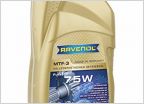 What GL rating should the transfer case gear oil have?
 Need (apparently rare) Accelerator Pedal Position Sensor Connector pig tail
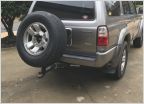 Folding Tire Carrier
Need guidance on changing head gaskets
Discussion in '3rd Gen 4Runners (1996-2002)' started by Shortstack, Aug 1, 2016.


