1. Welcome to 4Runners.com!

    You are currently viewing as a guest! To get full-access, you need to register for a FREE account.

    As a registered member, you’ll be able to:
    • Participate in all 4Runner discussion topics
    • Transfer over your build thread from a different forum to this one
    • Communicate privately with other 4Runner owners from around the world
    • Post your own photos in our Members Gallery
    • Access all special features of the site

How To: Replacing Rear Hatch Lift Supports

Discussion in '4th Gen 4Runners (2003-2009)' started by wnelax04sr5, Jun 10, 2015.

  1. Jun 10, 2015 at 10:38 AM
    #1
    wnelax04sr5

    wnelax04sr5 [OP] New Member

    Joined:
    Apr 6, 2014
    Member:
    #12
    Messages:
    2,577
    Gender:
    Male
    First Name:
    Ethan
    CT
    Vehicle:
    2004 SR5 4X4 Galactic Gray
    So after many years of being outside in the sun and heat, as well as the frigid cold, like all others, my hatch lift supports started making some awful noises when i raised and lowered it, as well as not being as effective when it came to holding it up.

    Parts:
    QTY 2: 03-04* Hatch Lift Supports, by Strong-arm, P/N 6107HD
    http://www.ebay.com/itm/370995391793

    *05-09 are different supports, and can be found here
    http://www.ebay.com/itm/Qty-2-Toyot...ft-Supports-/370990727524?hash=item5660c54164
    P/N PM1030

    Tools:
    12mm open end wrench
    12mm standard 3/8 drive socket
    IMG_20150610_121839_233.jpg

    Step 1:
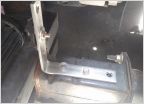
    After raising the tailgate, loosen the top two bolts on one of the lift supports
    IMG_20150610_121205_636.jpg
    Remove bolts completely
    IMG_20150610_120724_477.jpg
    Step 2:
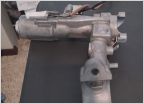
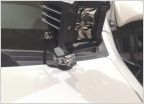
    Remove the lower mount bolt, the new supports come with a new ball for the socket, so you can remove this as one unit.

    IMG_20150610_120543_748.jpg
    IMG_20150610_120801_927.jpg
    Step 3:
    With either help, or one of your arms, push up on the lift gate and pull the support out. Then do the opposite of removal, starting with the installation of the lower ball, then the new support bracket at the top, finish by snapping the socket onto the new ball.
    IMG_20150610_121200_665.jpg
    IMG_20150610_121205_636.jpg

    Repeat the process on the other side, and no more annoying supports!

    IMG_20150610_121200_665.jpg
     
    This site contains affiliate links for which the site may be compensated.
    #1
    chassis, HoBoDanny and Bob like this.

Products Discussed in

To Top