1. Welcome to 4Runners.com!

    You are currently viewing as a guest! To get full-access, you need to register for a FREE account.

    As a registered member, you’ll be able to:
    • Participate in all 4Runner discussion topics
    • Transfer over your build thread from a different forum to this one
    • Communicate privately with other 4Runner owners from around the world
    • Post your own photos in our Members Gallery
    • Access all special features of the site
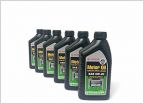
Cowboy59’s Install of the SSO Slimline Bumper & Warn EVO 10S Winch

Discussion in '5th Gen 4Runners (2010-2024)' started by Cowboy59, May 11, 2023.

  1. May 11, 2023 at 2:42 PM
    #1
    Cowboy59

    Cowboy59 [OP] Enjoy the Adventure

    Joined:
    May 17, 2020
    Member:
    #14355
    Messages:
    916
    Gender:
    Male
    N. Florida
    Vehicle:
    2020 Off-Road Premium w/ Predator package & KDSS
    I ordered the SSO Slimline bumper back in November. It finally arrived at the end of March. However, the Warn EVO 10S winch was still unavailable due to a recall. Warn stated they would not be available until the end of April. As fate would have it, I happened to the check the Quadratec site the third week of April, and they were back in stock. So I ordered one immediately. If you want to know why I ordered the winch from Quadratec, read post #8 at the link below.

    https://www.4runners.com/threads/vendors-i-would-buy-from-again.29943/

    l am not going to detail how to remove the old bumper and install the new one, as there are several useful YouTube videos that provide more detail. I found the two videos below very helpful.

    https://www.youtube.com/watch?v=vts8lnvQo3g

    https://www.youtube.com/watch?v=AaKOM9SQat8&t=692s

    I chose to leave the bumper cover off while mounting the bumper. It can be done either way. However, if you choose to leave the bumper off you will also need to remove one additional bracket under the hood latch assembly that is held on by four screws. This is shown in the second video link above. I found mounting the bumper very easy with the bumper cover off.

    The first step is to mount the winch to the bumper. I built a wood platform to go on my jack. I placed the bumper on the wooden platform and secured it with ratchet straps. This enabled me to get the bumper into position and get it mounted.

    After installing the bumper, it was time to wire up the winch. The first thing to do was to give a little more clearance for the power steering line. I removed the brackets from each side of the line. I then placed each one in a vise and bent it slightly back toward the radiator. Below is a picture of the bracket on the driver's side as you look into the engine bay.

    Screenshot 2023-05-11 at 3.39.22 PM.jpg

    After making the adjustments the line still touched control box of the winch, but with minor pressure. I went ahead and added some split wire loom just to keep rubbing from occurring on the control box.

    Screenshot 2023-05-11 at 3.43.06 PM.jpg

    The next step was to wire up the winch. This is fairly straight forward. I brought the wires up through the hole in the metal that was next the radiator and midway up. I then created loops, zip tied them and attached the ends to the battery.

    Screenshot 2023-05-11 at 4.02.31 PM.jpg

    Screenshot 2023-05-11 at 4.02.55 PM.jpg

    In the future, when I have extra time, I'll shorten the cables to get rid of the excess wire. Also, I put wire loom over the red cable from the winch to the where it entered the engine bay. I did this so you did not see the red cable through the front grill. Just my excess attention to detail.

    I ordered the bumper without access holes because I winch infrequently and did not want holes in the front of the bumper that would collect bugs and dirt. So that meant I had to create an access hole in the engine cover. There is nothing wrong with leaving the hole, but I am a bit of a perfectionist and wanted to make a nice cover just to make it look neater.

    So I bought a 12" x 12" 1/8" thick piece of ABS plastic and a 1/4"-20 x 1/2" long threaded knob from Amazon. I was able to find a 1/4"-20 x 1/4" threaded insert with a round backing at Lowe's.

    Below are pictures of my completed hole and screw in cover.

    upload_2023-5-11_16-19-28.jpg


    The cut was made such that I left an ⅛ of an inch from where the plastic began curving upward. The hole is not perfectly square, but follows the contour of the edge. The hole was cut 6.25 inches long.

    The left side of the hole started in line with the edge of the pushpin square.

    upload_2023-5-11_16-20-24.jpg


    Once the hole was cut I took a piece of of ⅛” plastic and cut out a piece that was ⅛" wider on the sides and 1” longer on the ends. I then used JBWeld to affix two pieces on the wide end as you see below.

    upload_2023-5-11_16-22-4.jpg


    The next step was to place a screw base in the engine bay cover. I used my Dremel tool to cut out a notch in the vertical stabilizer strip to mount the knob receiver. Using JB Weld again, I attached a 1" square piece of the ABS plastic to the cover, where I removed the vertical stabilize strip. Once the glue had set, I put the cover in place and drilled a hole through the cover and the engine bay cover as the same time. I then affixed the knob receiver as seen in the picture below.

    upload_2023-5-11_16-22-42.jpg


    With everything in place, I reinstalled the bumper cover and screwed in the knob. Below is the finished look.

    upload_2023-5-11_16-23-23.jpg


    And when you take the cover off, simply insert the screw knob and you won't lose it,

    upload_2023-5-11_16-23-47.jpg

    The cover sits perfectly flat and snug. I think the results turned out well.

    The last thing to do was address the gap underneath the 4R due to the plastic cover no longer working with the SSO bumper. Below is the piece I am referring to.

    Screenshot 2023-05-11 at 4.45.01 PM.jpg

    This piece was between the bottom of the bumper cover and my RCI skid plate. With the SSO Slimline bumper, this piece will not re-attach. So I initially took a rough cut with my Dremel tool to see what could be done.

    Below is the gap that I wanted to re-cover. What you see below from the top is the back of the bumper, and the bottom is the front edge of the skid-plate. In between the two is a foam barrier that will quickly wear out if not covered. That is why the cover was there in the first place.

    Screenshot 2023-05-11 at 4.50.18 PM.jpg


    The initial rough cut got me close, but I wanted to make a clean cut with a precise fit. With the rough cut piece, I was able to get in place enough to get an exact measurement. In order to make a clean cut on this oddly shaped piece I used my table saw. Unfortunately, you cannot just push the piece along the fence. The plastic must be held tighter than you can hold and keep a straight line. So the technique for making this type of cut is as follows:

    1. You need to make a fence that goes over the top of the table saw fence. It must fit snug, but be capable of sliding.

    2. Once you have the fence installed over the table saw fence, you clamp the plastic piece to the cover fence.

    3. You then slide the fence with the clamped plastic piece along the fixed fence and you will get a nice clean cut. Below is a picture of the cut piece.

    Screenshot 2023-05-11 at 4.59.49 PM.jpg

    And here is a picture of the piece installed.

    Screenshot 2023-05-11 at 5.06.05 PM.jpg


    And finally here is what the finished install looks like.

    Screenshot 2023-05-11 at 5.12.05 PM.jpg

    Warn recalled their EVO winches due to the wireless unit letting water in. As a result of my recent purchase of the Warn EVO 10S, which arrived without the wireless unit, they are sending me a free newer version of the wireless unit and giving me $100 credit on the WARN website. That is very nice.

    I am pleased with the results and I hope this post is of benefit to others.
     
    Last edited: May 20, 2023

Products Discussed in

To Top