

-
Welcome to 4Runners.com!
You are currently viewing as a guest! To get full-access, you need to register for a FREE account.
As a registered member, you’ll be able to:- Participate in all 4Runner discussion topics
- Transfer over your build thread from a different forum to this one
- Communicate privately with other 4Runner owners from around the world
- Post your own photos in our Members Gallery
- Access all special features of the site
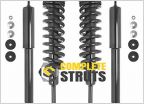 4th generation strut replacement
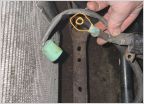 Broken Alternator Lug
 Tie Rods and Wheel Bearings 4th gen
 Wheel help
 Installing Wheel Bearing Assembly
 Can anyone confirm CV Axles 43430-60083 fit GEN4s?
Buzzing noise from the glove compartment
Discussion in '4th Gen 4Runners (2003-2009)' started by Pshuang04, Oct 19, 2018.


