-
Welcome to 4Runners.com!
You are currently viewing as a guest! To get full-access, you need to register for a FREE account.
As a registered member, you’ll be able to:- Participate in all 4Runner discussion topics
- Transfer over your build thread from a different forum to this one
- Communicate privately with other 4Runner owners from around the world
- Post your own photos in our Members Gallery
- Access all special features of the site
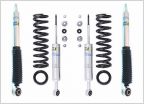 Torn on which lift... 5100 or 6112... '17 SR5
 Greasing UCAs
 Aftermarket spring on trd pro shocks
 Green Grease for UCAs?
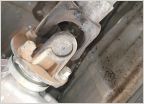 Lubing drive shaft question
 Mild lift suggestion for overlanding?
Best way to lift or level kdss system??
Discussion in 'Suspension' started by trail16whitebeast, Jan 5, 2017.
Page 1 of 3
Page 1 of 3