-
Welcome to 4Runners.com!
You are currently viewing as a guest! To get full-access, you need to register for a FREE account.
As a registered member, you’ll be able to:- Participate in all 4Runner discussion topics
- Transfer over your build thread from a different forum to this one
- Communicate privately with other 4Runner owners from around the world
- Post your own photos in our Members Gallery
- Access all special features of the site
 Roof Rack Showdown - Prinsu vs Southern Style Offroad
 2022 4runner auto dash dimming sensor
 Wireless charging mod
 Gear box/organizer and what do you keep in it?
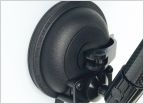 Best cell phone mount for 2021 ORP?
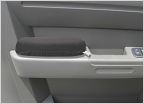 Doorsill armrest
Swaybar Disconnect for non KDSS
Discussion in '5th Gen 4Runners (2010-2024)' started by Yotaholic, Apr 2, 2024.
Page 3 of 3
Page 3 of 3