-
Welcome to 4Runners.com!
You are currently viewing as a guest! To get full-access, you need to register for a FREE account.
As a registered member, you’ll be able to:- Participate in all 4Runner discussion topics
- Transfer over your build thread from a different forum to this one
- Communicate privately with other 4Runner owners from around the world
- Post your own photos in our Members Gallery
- Access all special features of the site
 Slight lift needed
 Brake squeak slow speed
 Maintenance required?
 Tire inflator gage
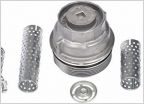 Any experience with Doorman metal filter cover?
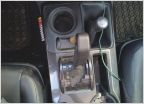 What has made my 5th gen gear shifter super squeaky?
Plastic trim rubbing off paint
Discussion in '5th Gen 4Runners (2010-2024)' started by Juuba, Sep 24, 2023.
Page 5 of 6
Page 5 of 6