-
Welcome to 4Runners.com!
You are currently viewing as a guest! To get full-access, you need to register for a FREE account.
As a registered member, you’ll be able to:- Participate in all 4Runner discussion topics
- Transfer over your build thread from a different forum to this one
- Communicate privately with other 4Runner owners from around the world
- Post your own photos in our Members Gallery
- Access all special features of the site
Quick Links: Name of part that goes from the air box to the engine itself?
 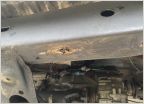 Frame rotted through.. how do I fix
  Where to get timing belt kit, water pump and head gasket?
 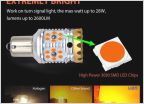 Upgrade to LED Signals, Brakes etc...Inexpensively???
 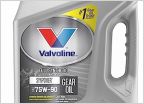 Replacing differential oil and correct oil to use
  Computer codes and check engine light
Changing Differential and Transfercase oil -**LOTS of PICTURES!**
Discussion in '3rd Gen 4Runners (1996-2002)' started by ramonortiz55, Feb 10, 2016.