1. Welcome to 4Runners.com!

    You are currently viewing as a guest! To get full-access, you need to register for a FREE account.

    As a registered member, you’ll be able to:
    • Participate in all 4Runner discussion topics
    • Transfer over your build thread from a different forum to this one
    • Communicate privately with other 4Runner owners from around the world
    • Post your own photos in our Members Gallery
    • Access all special features of the site

Old Man Tan

Discussion in '4th Gen Builds (2003-2009)' started by thefatkid, Feb 15, 2018.

  1. Feb 15, 2018 at 7:36 PM
    #1
    thefatkid

    thefatkid [OP] New Member

    Joined:
    May 24, 2017
    Member:
    #4089
    Messages:
    43
    Gender:
    Male
    Vehicle:
    OldManTan
    4th Gen 4Runner life
    I need to get a build thread going. It will kinda progress backwards and will be missing some pictures because I'm already 4 years into owning/build this rig for off road use. I'll try and keep this 1st picture/post updated with the current state of the vehicle.


    [​IMG]

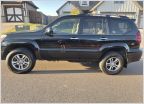
    The basics of the vehicle, a 2004 V6 4runner with 4wd and the SR5 package.

    Current state of mods:

    3" lift with OME parts
    Rear links by Rokmen Off Road
    285/75r17 Toyo MT tires on 5th gen Off Road wheels
    4.56 gears with rear Toyota electric locker
    Addicted Off road front bumper with Warn 9500 winch
    Addicted Off road sliders
    Cab mount chop using the InSain Fab plate
    CB by President
    ROX-RAK roof rack
    Fridge
    Odin Designs RTT

    The mod pile that needs completed
    Switchpro switch assembly
    ARB compressor for air up
    Snorkel
    Rokmen front arms and lower bushing rebuild
    HAM radio install

    Dreamers list of stuff that I don't have yet but plan on soon
    Rear bumper with a swing out or 2 for the full sized spare
    Rear drawer system with better mounts for the fridge
    PowerTrays tray for mounting the switch pro and possibly the compressor

    Some pictures will be hosted here. I'll try and bring more over from Tacoma World as I work on this thread.
     
    Last edited: Feb 15, 2018
  2. Feb 15, 2018 at 7:36 PM
    #2
    thefatkid

    thefatkid [OP] New Member

    Joined:
    May 24, 2017
    Member:
    #4089
    Messages:
    43
    Gender:
    Male
    Vehicle:
    OldManTan
    4th Gen 4Runner life
    So I'm starting to build a couple "new to me" vehicles. Moving my 96 4runner and 83 pickup to new owners. I recently purchased a 94 pickup and 2004 4runner, both with blown head gaskets. The 94 will be a very slow build to a wheeler while the 2004 needs to be up and running asap. I didn't want to get rid of my 1996 4runner but I needed slightly more family room and greater towing ability.

    [​IMG]

    The 2004 4runner is a v6. It has a blown head gasket, leaking into cylinder #6. This is a common failure point that I have seen, this will be my 10th head gasket replacement on the GR motor family. I want to say they have only been 4runners, I'm not sure though.

    [​IMG]

    [​IMG]

    I was able to start the tear down today. As you can see I just got the timing cover off before I had to leave. Tomorrow will be the head removal and assembly if I'm not slacking like I was today.

    1st mod! (some of my slacking). Running boards removed, I guess that is not a mod though.

    [​IMG]

    Test fitting the 255s and installing the tire pressure sensors.

    [​IMG]

    The plan is for about 3" of lift. OME because of a local used set of fronts will save money for a front bumper and sliders. I'm not sure on who's bumpers/sliders yet. Demello and Addicted look good.

    I'll get some heads off pictures tomorrow.

    I was able to finish up the head gaskets at about 6 on Saturday. It feels like most of the time is spent scraping the FIPG off of the mating surface. I measured for deck warping and couldn't get a .0015" gauge in anywhere.

    Cleaning

    [​IMG]

    The crosshatch looks great, this is at 200k miles. Don't mind the spots, I didn't clean it at all yet.

    [​IMG]

    I didn't get any more pictures as I was really pressed for time to be able to finish it in time. The guides for the chain showed no wear at all. The cylinder walls looked great. I got lucky and found out that this truck has a great national service history, every 3-4k for an oil change.

    I put a call into Addicted Off Road. They are starting to work on a production run of the 4th gen front bumpers. I'll order on up tomorrow and it looks like a 8-10week wait time. The wait sucks but the product looks great. I'm also thinking about his HD sliders, I meant to ask him if they can be built without a kick out. I'm not too fond of slider kick outs.

    http://www.addictedoffroad.com/index.php?main_page=product_info&cPath=1&products_id=699

    I will be ordering my rear lift from Toytec tomorrow. I hope to have it tomorrow really. I might be able to use a parts driver to pick them up so I can install the lift after work. I'm sure I'll find a seized bushing or 4, they were all stuck on my 3rd gen.
     
    Watt maker likes this.
  3. Feb 15, 2018 at 7:38 PM
    #3
    thefatkid

    thefatkid [OP] New Member

    Joined:
    May 24, 2017
    Member:
    #4089
    Messages:
    43
    Gender:
    Male
    Vehicle:
    OldManTan
    4th Gen 4Runner life
    A little update, I did get the lift on tonight. It was a fighter but I did win in the end. The front is OME shocks with 886 springs (will have a winch bumper in 8-10 weeks). An the rear is the ToyTec superflex HD springs and OME shocks. The ride is firm but not jarring.

    [​IMG]

    I will be needing upper control arms. I could not get the camber or caster where I want them. I will wait until I get the bumper and sliders on before I make a decision.

    [​IMG]

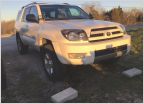
    I looked up the color code and found out it was Old Man Tan :(
     
    Watt maker and BassAckwards like this.
  4. Feb 15, 2018 at 7:38 PM
    #4
    thefatkid

    thefatkid [OP] New Member

    Joined:
    May 24, 2017
    Member:
    #4089
    Messages:
    43
    Gender:
    Male
    Vehicle:
    OldManTan
    4th Gen 4Runner life
    I run a portable fridge so I need 12v power with the key off. I also like the idea of powering my cell phones or other 12v socket items with the key off. So I was thinking how could I easily modify the way Toyota built this system to power all the time.

    [​IMG]

    Looking at the wiring diagram the circuit is very simple. It is a power switched relay. I could either provide power to the relay or jumper the relay to "close the circuit". I didn't want to build a jumper because I was worried about making the relay terminals loose, not allowing it to go back to stock. I didn't really want to cut into the factory wiring either, I'd like it to be easy to go back to stock if I need to.

    I found the relay.

    [​IMG]

    I had to remove the drivers knee panel and remove the bolts/nuts that hold the fuse block on. I just pulled the fuse block down just a little to see and remove the relay.

    [​IMG]

    The relay removed (yellowish) was a solid state relay. I can't really do much in the form of modification because it is sealed in epoxy. I did have an extra relay laying around it is a conventional one.

    [​IMG]

    Inside the red circle I soldered the contacts together. This makes a simple jumper that is easy to remove and return to stock. Inside the relay I removed the connections to the coil so I have no chance of affecting the ignition circuit.
     
    Watt maker likes this.
  5. Feb 15, 2018 at 7:38 PM
    #5
    thefatkid

    thefatkid [OP] New Member

    Joined:
    May 24, 2017
    Member:
    #4089
    Messages:
    43
    Gender:
    Male
    Vehicle:
    OldManTan
    4th Gen 4Runner life
    Old Man Tan finally has an update. I recently got my bumpers and sliders from Addicted! Yes, I ordered them in July. I'm not too hot on the wait time, they seem to be improving for some though.

    [​IMG]

    I did a little prep work. Had to cut off some bumper brackets and paint behind the bumper.

    [​IMG]

    It fitted up ok. There was more grinding then I would have thought. The bracket that the bumper bolts to seems to need a better jig or more careful assembly. I had to enlarge most of the holes on the drivers side. Not quite "bolt on".

    [​IMG]

    A point to note about Addicted Off Road bumpers, they seem to only be built for 8000lb winch sizes. I could not fit my 9500lb winch without being 1.5" off center. An 8000lb winch would have fit without issue but the fat 4th gen needed a little more headroom for safe pulling. I opted to cut a hole the size of the motor while trying to keep as much structure as possible. The final hole has about 1/8" gap all the way around. I need to snap a final fit pic.

    Earning my EAF sticker, one mod at a time.
     
    Watt maker likes this.
  6. Feb 15, 2018 at 7:38 PM
    #6
    thefatkid

    thefatkid [OP] New Member

    Joined:
    May 24, 2017
    Member:
    #4089
    Messages:
    43
    Gender:
    Male
    Vehicle:
    OldManTan
    4th Gen 4Runner life
    Continuing with the bumper/winch install. The final clearance around the winch motor and trimming of the cover for the motor. I have about 4 hours in all the trimming I have to do, the 9500lb winch was worth it though.

    [​IMG]

    The factory battery terminals just will not cut it. I have seen a couple melt down.

    [​IMG]

    I picked up some military spec battery terminals. I've seen them rated over 500 amps. A loaded winch can peak over 300 amps, possibly more. I'll try and remember to check with my amp meter next time I winch.

    [​IMG]

    The fit turned out nice. I need an LED or something for those light tabs.

    [​IMG]

    The final fit is very close to the fenders, to the point that when I 4wheel it touches. I'm going to possibly body lift the truck or lower the bumper by grinding the holes for mounting. Either way, I'm looking for only 1/4" for now. The look is way improved over the stock bumper. The sliders are out of the way enough that they don't hinder entrance or exit of me or the kids.

    [​IMG]
     
    Last edited: Feb 15, 2018
    Watt maker and GreyRunner like this.
  7. Feb 15, 2018 at 7:43 PM
    #7
    thefatkid

    thefatkid [OP] New Member

    Joined:
    May 24, 2017
    Member:
    #4089
    Messages:
    43
    Gender:
    Male
    Vehicle:
    OldManTan
    4th Gen 4Runner life
    I have one of the differentials built. An 8"electric locker. Fitted with 4.56 Nitro gears.

    [​IMG]

    Shitter is, I used the pinion flange from the diff that was out of a 1st gen Tacoma. The drive shaft pattern is too small. Luckily I used a solid spacer so a swap will be easy.

    Getting the front diff built. The pattern came in around .065" of pinion shim. Eric's was around .069". I wish the fronts used adjusters rather then shims for the side gears, those get tedious when searching for carrier preload and back lash.

    [​IMG]

    I'll get them installed tomorrow. I'll have to do the housing mod to the rear. If you didn't want to mod the housing, a 4th gen rear is the same as an FJ Cruiser.
     
    WallyT4R likes this.
  8. Feb 15, 2018 at 7:43 PM
    #8
    thefatkid

    thefatkid [OP] New Member

    Joined:
    May 24, 2017
    Member:
    #4089
    Messages:
    43
    Gender:
    Male
    Vehicle:
    OldManTan
    4th Gen 4Runner life
    The 4runner is getting a little Rock Therapy love. I won some RCI A-Arm skid plates. Go them installed today. I'm also in the process of installing the Anti-Dark hood lights on the 4runner.

    [​IMG]

    I was able to install my Anti-Dark. I won it last year just after I picked up my 2004 4runner. The install is easy with the provided parts. A must have part for those who wheel at night. @BeeRadd@Mach375 Thank you for allowing me to see the light

    [​IMG]
     
    Last edited: Feb 15, 2018
    Watt maker likes this.
  9. Feb 15, 2018 at 7:43 PM
    #9
    thefatkid

    thefatkid [OP] New Member

    Joined:
    May 24, 2017
    Member:
    #4089
    Messages:
    43
    Gender:
    Male
    Vehicle:
    OldManTan
    4th Gen 4Runner life
    I'm doing a 1/2" body lift, cab mount chop, possible bump stop adjustment and some cutting. Need to make room for larger tires. I went to 315s for a bit but ended up with the 285/75r17 size

    [​IMG]
    [​IMG]
    The factory bolts work with the 1/2" body lift.

    I hope to get a good amount of grinding and fitting tomorrow so I can move onto welding. Then I will pull the springs and cycle the suspension. Hope to have tire clearance by the weekend.

    [​IMG]

    My rear link mounts were starting to take some damage so I rebuilt/plated them While I installed the rear Rokmen Links.

    [​IMG]

    [​IMG]

    I suck at taking clear pictures while I'm working I guess

    [​IMG]

    New link mounts, links and brakes. Good times
     
    Last edited: Feb 15, 2018
    Watt maker, WallyT4R and Bob like this.
  10. Feb 15, 2018 at 7:58 PM
    #10
    thefatkid

    thefatkid [OP] New Member

    Joined:
    May 24, 2017
    Member:
    #4089
    Messages:
    43
    Gender:
    Male
    Vehicle:
    OldManTan
    4th Gen 4Runner life
  11. Feb 16, 2018 at 8:19 AM
    #11
    brochacho

    brochacho New Member

    Joined:
    Jun 20, 2016
    Member:
    #2179
    Messages:
    467
    Gender:
    Male
    PNW
    Vehicle:
    2018 Sequoia TRD Sport
    Sweet build! Love the "old man tan" name.
     
    thefatkid[OP] likes this.
  12. Feb 16, 2018 at 8:33 AM
    #12
    Caltech90

    Caltech90 New Member

    Joined:
    Aug 24, 2017
    Member:
    #4637
    Messages:
    127
    Gender:
    Male
    Vehicle:
    '19 TRD OR
    Awesome build!
     
  13. Feb 16, 2018 at 8:16 PM
    #13
    Rokmen

    Rokmen New Member Vendor

    Joined:
    Feb 13, 2018
    Member:
    #5483
    Messages:
    59
    OH hey! Here you are. A few more shots of that roof rack are good for this thread. :D

    4th gen 4r.jpg 20180211_171203.jpg 20180211_171546.jpg 20180211_172311.jpg
     
  14. Feb 16, 2018 at 8:17 PM
    #14
    Rokmen

    Rokmen New Member Vendor

    Joined:
    Feb 13, 2018
    Member:
    #5483
    Messages:
    59
    Who is this fool with an Old Man Tan Taco?????20180211_164634.jpg
     
  15. Mar 12, 2018 at 9:48 PM
    #15
    thefatkid

    thefatkid [OP] New Member

    Joined:
    May 24, 2017
    Member:
    #4089
    Messages:
    43
    Gender:
    Male
    Vehicle:
    OldManTan
    4th Gen 4Runner life
    Working on my antenna placement for upcoming radio changes. The "wide band" 2m/70cm antenna on a hood lip mount. This antenna claims gains in the indirect line of sight communications, COMPACtenna. I mounted it on a Diamond K400SNMO mount to the back of the hood. The Devils Radio (CB) is a President "New York" antenna, it is a mag mount and will be center mounted on the roof in front of the rack. I need to finish up that Tundra job so I can get my runner in the garage.

    [​IMG]
    Antenna site with videos

    https://compactenna.com/
     
    Watt maker, Rokmen and BassAckwards like this.
  16. Mar 13, 2018 at 10:23 AM
    #16
    BassAckwards

    BassAckwards New Member

    Joined:
    Aug 29, 2016
    Member:
    #2575
    Messages:
    206
    Vehicle:
    2006 4Runner V6 SR5
    Nice looking build! I dig the old man tan! Do you know if this color is called desert sand mica like it is on the tacomas?
     
  17. Jun 1, 2018 at 10:03 PM
    #17
    thefatkid

    thefatkid [OP] New Member

    Joined:
    May 24, 2017
    Member:
    #4089
    Messages:
    43
    Gender:
    Male
    Vehicle:
    OldManTan
    4th Gen 4Runner life
    I was able to get some time away from working on others cars. I needed to get my shortwave gear mounted. I wanted to clean up the radios from being everywhere.


    So I decided on a DIN sized CB and downsized my radio to single DIN. I built a bracket that would wrap around the CB to mount the detachable face plate of the shortwave radio. I also wanted to add a spot for a tablet for GPS functions.


    This new setup runs a President McKinley CB with SSB and Weather functions. The short wave radio is a Yeasu FT-7900r. The head unit is a bare bones Pioneer CD player with bluetooth. I mounted the external antenna for the shortwave in the JBL speaker spot that had like a 2.5" speaker.


    I had the bracket powder coated so it is pretty.

    Oh yea, KE0PUI
     
    Last edited: Jun 1, 2018
    Watt maker and jgcaps like this.
  18. Jul 4, 2018 at 12:44 PM
    #18
    thefatkid

    thefatkid [OP] New Member

    Joined:
    May 24, 2017
    Member:
    #4089
    Messages:
    43
    Gender:
    Male
    Vehicle:
    OldManTan
    4th Gen 4Runner life
    Getting a big project going. Both front alignment cams were seized and the bushings in the OME shocks were blown.


  19. Jul 4, 2018 at 9:41 PM
    #19
    thefatkid

    thefatkid [OP] New Member

    Joined:
    May 24, 2017
    Member:
    #4089
    Messages:
    43
    Gender:
    Male
    Vehicle:
    OldManTan
    4th Gen 4Runner life
    I forgot that I finally started stealing parts off of the mod pile. 2 weeks ago I finally got the rear Toytec Boss 2.5s on. Not pictured is a p-clamp securing the hose.


    I didn't make it as far as I wanted tonight. I'm rebuilding the lower arms with Moog ball joints and Whiteline bushings. The installed parts are Rokmen UCA and Icon 2.5 with resi. I'm running the springs that came with them for now, bet I'll have to change them out for heavier rates though.

     
    Watt maker and jgcaps like this.
  20. Jul 5, 2018 at 3:45 AM
    #20
    POOLGUY

    POOLGUY New Member

    Joined:
    Aug 16, 2016
    Member:
    #2481
    Messages:
    227
    Gender:
    Male
    First Name:
    Jeff
    Vehicle:
    '08 4RUNNER
    :thumbsup: Good looking ride.
     
    thefatkid[OP] likes this.
  21. Jul 5, 2018 at 7:37 AM
    #21
    jgcaps

    jgcaps Lovin the Colorado Life.!

    Joined:
    May 30, 2018
    Member:
    #6147
    Messages:
    923
    Gender:
    Male
    First Name:
    John
    CO
    Vehicle:
    2018 MGM TRD ORP KDSS 4Runner
    3" Icon Stage 2, 18x9 Fuel Beast wheels, 285/65/18 BFG KO2's, N-FAB Black Rock Rails w/removable steps.
    Great build.! thanks for sharing
     
    thefatkid[OP] likes this.
  22. Jul 10, 2018 at 5:43 PM
    #22
    thefatkid

    thefatkid [OP] New Member

    Joined:
    May 24, 2017
    Member:
    #4089
    Messages:
    43
    Gender:
    Male
    Vehicle:
    OldManTan
    4th Gen 4Runner life
    Finished it up on Sunday. Working on dialing in the alignment with the upper arms while leaving the lowers maxed for the most caster (most firewall clearance). I'll have the upper arms off a couple times in the next couple days I'm sure.

     
    jgcaps and BassAckwards like this.
  23. Jul 15, 2018 at 1:15 PM
    #23
    thefatkid

    thefatkid [OP] New Member

    Joined:
    May 24, 2017
    Member:
    #4089
    Messages:
    43
    Gender:
    Male
    Vehicle:
    OldManTan
    4th Gen 4Runner life
    I decided to switch the radio out to an APRS friendly unit while I wait on my Coastal Off Road bumper to show up.

     
    Watt maker and FourstarT like this.
  24. Aug 6, 2018 at 6:17 PM
    #24
    thefatkid

    thefatkid [OP] New Member

    Joined:
    May 24, 2017
    Member:
    #4089
    Messages:
    43
    Gender:
    Male
    Vehicle:
    OldManTan
    4th Gen 4Runner life
    Going to be working on an adult jigsaw puzzle from @Coastal Offroad.


    I was lucky enough to have it delivered in a rain storm so I'll have to clean up a little rust. Also the UPS man was nice enough to drop all of the boxes so I'm missing some of the small parts.


    Should be able to work around those 2 with minimal cutting/fabbing.
     
    Watt maker likes this.
  25. Aug 11, 2018 at 7:32 AM
    #25
    thefatkid

    thefatkid [OP] New Member

    Joined:
    May 24, 2017
    Member:
    #4089
    Messages:
    43
    Gender:
    Male
    Vehicle:
    OldManTan
    4th Gen 4Runner life
    Took all week up until last night to get the time to tack it together, liking the lines.


    Watt maker and SlvrSlug like this.
  26. Aug 12, 2018 at 10:02 AM
    #26
    thefatkid

    thefatkid [OP] New Member

    Joined:
    May 24, 2017
    Member:
    #4089
    Messages:
    43
    Gender:
    Male
    Vehicle:
    OldManTan
    4th Gen 4Runner life
    Welder workout!

     
    Watt maker, jgcaps and SlvrSlug like this.
  27. Aug 13, 2018 at 6:18 AM
    #27
    jgcaps

    jgcaps Lovin the Colorado Life.!

    Joined:
    May 30, 2018
    Member:
    #6147
    Messages:
    923
    Gender:
    Male
    First Name:
    John
    CO
    Vehicle:
    2018 MGM TRD ORP KDSS 4Runner
    3" Icon Stage 2, 18x9 Fuel Beast wheels, 285/65/18 BFG KO2's, N-FAB Black Rock Rails w/removable steps.
    wish I could do that stuff... can't wait to see it when you're finished.!
     
    thefatkid[OP] likes this.
  28. Aug 24, 2018 at 9:26 AM
    #28
    yohansc

    yohansc New Member

    Joined:
    Jun 4, 2018
    Member:
    #6189
    Messages:
    3
    Gender:
    Male
    First Name:
    Yohans
    Vehicle:
    2004 4runner, v6 4.0, OME 883 front, Toytec Superflex rear, Bilstein 5100 all around
    Bilstein - OME - Toytec suspension, Iridium plugs.
    Great built, that Part number of rear OME shocks you used, when you had Toytec superflex coils?
     
  29. Oct 19, 2018 at 9:17 AM
    #29
    thefatkid

    thefatkid [OP] New Member

    Joined:
    May 24, 2017
    Member:
    #4089
    Messages:
    43
    Gender:
    Male
    Vehicle:
    OldManTan
    4th Gen 4Runner life
    Forgot to post my drawer install. I did trade for this but had to do some modifications to make it work in the 4th gen, was built for a GX. 8020.net can really help you build some cool things.


    Yes, my bumper is not finished yet :rolleyes: I suck.
     
    Watt maker, WallyT4R and jgcaps like this.
  30. Feb 10, 2019 at 4:42 PM
    #30
    HoBoDanny

    HoBoDanny Dude...

    Joined:
    Feb 5, 2019
    Member:
    #8697
    Messages:
    966
    Gender:
    Male
    First Name:
    Daniel
    Kentucky
    Vehicle:
    2004 SR5 V6 4WD 4Runner
    RCI Skid Plate CBI Ditch Light Brackets Hankook DynaPro ATM RF10 265 70R17 113T Tires 1.25” Wheel Spacers TPMS Bypass Mod Hydrocarbon Filter Removed Merca decal 2” leveling kit front only Black headlights
    Really going all out on this build. Hopefully I will get there at some point. Ever finish that bumper?
     
    jgcaps likes this.

Products Discussed in

To Top