1. Welcome to 4Runners.com!

    You are currently viewing as a guest! To get full-access, you need to register for a FREE account.

    As a registered member, you’ll be able to:
    • Participate in all 4Runner discussion topics
    • Transfer over your build thread from a different forum to this one
    • Communicate privately with other 4Runner owners from around the world
    • Post your own photos in our Members Gallery
    • Access all special features of the site

Strut disassembly - you can do it!

Discussion in 'Suspension' started by BLKNBLU, Jun 15, 2025.

  1. Jun 15, 2025 at 2:44 PM
    #1
    BLKNBLU

    BLKNBLU [OP] New Member

    Joined:
    Jul 23, 2024
    Member:
    #41779
    Messages:
    722
    Gender:
    Male
    First Name:
    Mike
    Arizona
    Vehicle:
    2019 Nautical Blue OR
    So I have some Bili 5100s waiting to go on the 4runner. And I have been in no particular rush to install them...
    I want to keep my stockers intact in case I decide to go back for some reason. Plus it will minimize down time. So I found a set on Offer Up for $25 but they had 1 1/2 inch spacers on them and also came with 2 inch rear spacers. I was able to sell those for $20 locally on Offer Up so I'm only $5 into parts.
    My plan has been to disassemble and transfer to the Bilis. I got some compressor clamps from Autozone but the safety pins would not clear the springs so I decided to not proceed with those. I have an acquaintance that does a lot of fab work that would assemble for $60. But I really wanted to try it myself so after much analysis paralysis I finally sent off to Bezosworld for a cheapy heavy duty clamp set. (Oxymoron, I know)
    So here we go...

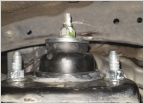
    The subject shocks to be disassembled. Please note that one shock appears more tightly wound than the other. I had not noticed this before. It also appears to have been acquainted with UCA on the previous owners setup.
    IMG_20250615_114629950.jpg IMG_20250615_114640391.jpgIMG_20250615_114709606.jpg


    The aforementioned and oxymoronic "cheapy heavy duty compressor set" and my 19 mm socket. The instructions included no info whatsoever on the semi-circular device so I winged it. It required a 6mm Allen BTW.
    IMG_20250615_115109980.jpg


    All lined up and ready to go.
    I compressed back and forth with about 3 rotations each time.
    IMG_20250615_120559753.jpg IMG_20250615_120018175.jpg


    After about 7 back and forths we have separation.
    IMG_20250615_120605861.jpg IMG_20250615_120630330.jpg


    Then I held the shock tip with a vice grip and loosened the top nut with a 17mm .
    IMG_20250615_120831191.jpg


    After all that, the springs do in fact look different. I'll go do some reading but I don't think that is right. It may end up all I got was top hats for my $5 but hey, I'll take it.
    IMG_20250615_124010658.jpg


    Look Ma! I still have ten fingers.:)
    IMG_20250615_130941278.jpg
    With all the YT vids out there about how this job is certain death, I just wanted to show that if your careful and methodical and sober you can do this. Took me just shy of an hour going carefully and double/triple checking everything and using hand tools only.
    Admittedly I still need to get the new assemblies together on the Bilsteins and that will require more compression than the disassembly did. But it was 108° out today and I still need to see what's what with these asymmetric springs so I think that's enough for today.

    Happy wrenching.
     
    Last edited: Jun 15, 2025
  2. Jun 15, 2025 at 2:49 PM
    #2
    ChessGuy

    ChessGuy New Member

    Joined:
    Oct 22, 2021
    Member:
    #23918
    Messages:
    1,161
    Gender:
    Male
    First Name:
    LR
    Houston
    Vehicle:
    2020 Venture/ 2017 Tacoma
    Too many..... Performance: • Magnusum Supercharger • Gibson exhaust with dual black tip • Pedal Commander * PowerBrakes • Suspension – Old Man Emu BP-51 front and back with Medium load coils • Tires: AT3 Faulken Wildpeak – 285/70/17 • Wheels: Relations Race Wheels, RR7-H with -12 offset • Full roof rack and ladder by Westcott Design (removed the stock Yakima basket) • Molle storage panels by Rago fabrication • Front light brackets by Rago • Illuminator light bracket by Rago (roof rack location) Lights • Morimoto front and back with sequential signals • Morimoto fog lights and side mirrors with sequential signals • 40” Baja design light bar for roof rack • 20” S8 Baja design driving combo (winch location) • Squadron sport baja design ditch lights • S2 Chase lights by baja designs (mounted on roof) In the bay: • Odyssey 34-PC Battery • SDQH Aluminum billet battery terminals and bracket • Switch Pro 9100 with aluminum tray • Anytime front and back camera • ARB twin compressor Recovery & Protection: • Smittybilt X20 synthetic rope winch • Factor 55 fairlead and flatlink • Southern Style Off-road (SSO) low profile bumper • SSO stage 2 high clearance wings • Weekend warrior recovery kit by treaty oak • RCI – skid plates – entire vehicle + catalytic converter protection wings Interior: • Nano Ceramic IR – Avery Dennison Window tint – all windows • Several phone mounts • Upgraded Rear Hatch lift gate struts (ladder is heavy) • Boom blaster horn switch (featuring La cucaracha)
    :hattip:Well done. I must say, I tried doing this 5 yrs ago when I wanted to put a pre-collar lift on the FOX trd suspension and boy this was a workout. I was a bit worried things were going to snap and hit me in the face. Looks like you got it!
     
  3. Jun 15, 2025 at 2:55 PM
    #3
    BLKNBLU

    BLKNBLU [OP] New Member

    Joined:
    Jul 23, 2024
    Member:
    #41779
    Messages:
    722
    Gender:
    Male
    First Name:
    Mike
    Arizona
    Vehicle:
    2019 Nautical Blue OR
    Yeah. I haven't decided where I want to set the Bilstein perch yet but I'm going to have to squish those springs down a good bit more for anything above zero, so we'll see how that goes. More to come. :rolleyes:
     
  4. Jun 15, 2025 at 3:05 PM
    #4
    HuskyMike

    HuskyMike New Member

    Joined:
    Jan 23, 2023
    Member:
    #30835
    Messages:
    676
    San Diego
    Vehicle:
    2023 4Runner TRD Off Road Premium- Nautical Blue
    Sort of looks like those two springs have different spring rates. I still have my stock (assembled) struts in a box on a shelf. I can see if the springs look different like those... although mine is a '23 so there may be a difference in strut models.
     
  5. Jun 15, 2025 at 3:21 PM
    #5
    BLKNBLU

    BLKNBLU [OP] New Member

    Joined:
    Jul 23, 2024
    Member:
    #41779
    Messages:
    722
    Gender:
    Male
    First Name:
    Mike
    Arizona
    Vehicle:
    2019 Nautical Blue OR
    Thanks. I see the actual struts have the same part # but the springs have different paint markings so maybe Toyota did something for unequal weight up front or to address the driver side lean that I'm not aware of. I'll be interested to see what you come up with.
     
  6. Jun 15, 2025 at 3:44 PM
    #6
    BLKNBLU

    BLKNBLU [OP] New Member

    Joined:
    Jul 23, 2024
    Member:
    #41779
    Messages:
    722
    Gender:
    Male
    First Name:
    Mike
    Arizona
    Vehicle:
    2019 Nautical Blue OR
    Hmmm.
    48131-35650 RH spring
    48131-35720 RH Limited

    48131-35620 LH spring
    48131-35650 LH Trail Package (TRD OffRoad) & stabilizer KDSS
    48131-35730 LH Limited

    Curious...same lt and rt spring part # on the Off Road only, which I got.
     
  7. Jun 15, 2025 at 3:46 PM
    #7
    roooo

    roooo New Member

    Joined:
    Nov 11, 2023
    Member:
    #36679
    Messages:
    515
    2018 Silver ORP KDSS
    Well done

    I've thought about attempting this but I rather drive about 5 minutes to a nearby car shop, bring a cold 12 pack, and watch them do the work
     
  8. Jun 15, 2025 at 4:16 PM
    #8
    BLKNBLU

    BLKNBLU [OP] New Member

    Joined:
    Jul 23, 2024
    Member:
    #41779
    Messages:
    722
    Gender:
    Male
    First Name:
    Mike
    Arizona
    Vehicle:
    2019 Nautical Blue OR
    Yes, it turns out the SR5 has 2 different springs, a 7 coil and 8 coil. The TRD gets 8 and 8 regardless of KDSS. This was pretty easy to find and wish I had looked into it sooner... But c'est la vie, 65 y/o and still learning. Guess I'll have to figure out what I do next.
     
    roooo likes this.
  9. Jun 15, 2025 at 6:23 PM
    #9
    HuskyMike

    HuskyMike New Member

    Joined:
    Jan 23, 2023
    Member:
    #30835
    Messages:
    676
    San Diego
    Vehicle:
    2023 4Runner TRD Off Road Premium- Nautical Blue
    Mine look the same as yours. I'm assuming it's because of the driver lean thing.

    I have an Off Road Premium.

    [​IMG]
     
  10. Jun 15, 2025 at 8:05 PM
    #10
    BLKNBLU

    BLKNBLU [OP] New Member

    Joined:
    Jul 23, 2024
    Member:
    #41779
    Messages:
    722
    Gender:
    Male
    First Name:
    Mike
    Arizona
    Vehicle:
    2019 Nautical Blue OR
    Cool. So the 8 and 8 coil thing I read doesn't seem to pan out. I think I may just throw these things together and see what I get.

    Edit: and good on ya to mark 'em for me so I know where they go.
     
    HuskyMike likes this.
  11. Jun 16, 2025 at 6:39 AM
    #11
    morfdq

    morfdq New Member

    Joined:
    May 25, 2022
    Member:
    #27196
    Messages:
    1,388
    Gender:
    Male
    First Name:
    Derek
    Vehicle:
    2022 SR5 Premium
    TRD Wheels, exhaust, Eibach, Cali Raised Skid Plate, Diode Dynamics fog, Sherpa Crestone rack.
    Job well done, i like the initiative you took. For me, I take them to my local shop, they take them off and swap to the new ones for $20. To me its two things, first safety then also i want to make sure they were assembled correctly. I dont like doing jobs twice.
     
  12. Jun 16, 2025 at 6:55 AM
    #12
    1SilverRunner

    1SilverRunner My boy, blue

    Joined:
    Jan 15, 2024
    Member:
    #37925
    Messages:
    1,912
    Gender:
    Male
    Tejas
    Vehicle:
    22 TRD Off Road Premium
    Front Bumper: C4 Fabrication Low-Profile Bumper Warn Evo10-S Winch w/ Warn wireless adapter Extreme LED dual color light bar w/ Cali raised LED OEM style switch Bumper Cover Trimmed For Clearance Rear Bumper: 80% Off Road Rear Bash Bar (Limited rear bumper version) Armor: RCI Skid plate package C4 Gas tank skid (modified) RCI Rear diff skid RCI Shock Skids RSG Angled/ Plated Sliders Total Chaos Cam Tab Gussets Total Chaos Spindle Gussets 41.22 Hitch Slider Suspension: Dobinsons IMS long travel shocks: (Front: IMS59-50574 w/ Apache CF220 Springs) (Rear: IMS59-50575 w/ C59-677v Springs) Apex Chassis Tie Rod Assemblies (KIT410) Apache Off Road UCAs Apache Off Road HD Rear Links (Upper and Lower) Apache Off Road Rear Sway Bar Links Dobinsons Track Bar Front Sway Bar Deleted DuroBumps Rear Bump stops PerryParts Front Bump stops DRKDSS Track Bar Correction kit Dobinsons Diff Drop Wheels/ Tires: RRW 17x8.5 -12 RR6-H Wheels 285/75/17 Falken A/T4W 1.25" SpiderTrax Spacers BMC, Pinch Weld Folded. C4 High Clearance Fender Liners Performance: OTT Tuned Scan Gauge II for Temp Monitoring Yota Shop Diff Breather Storage Solutions: Sherpa Crestone Sport roof rack Aiden James Customs Gear Plate w/ Slide Out Tables Rado Designs Molle storage panels and top shelf Glove Box organizer Center Console organizer Interior: Diode Dynamics LED Interior lighting (Warm white ftw) Meso Customs Hatch lights Meso Customs Door Handle Covers Ram ball mount for Garmin In-Touch Mini II FitCamX Dash Camera Scosche phone mount Weathertech floor matts Misc: Nano Ceramic Tint (Including windshield and sunroof) Midland MXT575 and Ghost Antenna Cali Raised LED 27W Ditch Lights w/ oem style switch OVS Nomadic 6.5' Awning AVS Low Profile Vent Visors AVS Bugflector II Diode Dynamics puddle lights Lasfit LED Reverse lights LED license plate lights Ark Splash Guards Ark Mud Flap Deletes (cut for rear bumper/ bash bar) AJT Push-To-Start Button +Midland handheld GMRS radios, Baofeng UV-5R Ham radio, recovery gear, water purification system, lifeboat food rations, trauma kit, fire extinguisher and fire starting kit stay on board.
    Job well done!

    Here's a copy paste from my build thread. Went from 730# springs to 650's.
    I did not have all the correct tools and had to get creative. Still, had all my fingers afterward as well :anonymous:


    Disconnected the LCA from the spindle and dropped the coilover out from the bottom.

    [​IMG]

    Disassembled with spring compressors.

    [​IMG]

    Realized the spring compressor I had would not work with the new springs… so I improvised. I’ll admit, this was about as sketchy as it looked. But it worked like a charm.

    [​IMG]

    Got the coilovers reinstalled and went on a test drive!

    [​IMG]

    The ride was much better after this swap. Saved at least $300 by doing it myself and got as picky as I needed to when adjusting preload to correct the Toyota lean.

    Another plus is being able to put anti seize on the locking collars and LCA bolts while I was there. These are steps a lot of shops won't take. Also torqued everything to spec unlike certain shops just using an impact... Some shops are better than others of course. But at this point I'd rather do the job myself. I know it was done right and I learn a little more on each new job.
     
    Last edited: Jun 16, 2025

Products Discussed in

To Top