

-
Welcome to 4Runners.com!
You are currently viewing as a guest! To get full-access, you need to register for a FREE account.
As a registered member, you’ll be able to:- Participate in all 4Runner discussion topics
- Transfer over your build thread from a different forum to this one
- Communicate privately with other 4Runner owners from around the world
- Post your own photos in our Members Gallery
- Access all special features of the site
 Tie Rods and Wheel Bearings 4th gen
 03 sr5 fuse block needs to be replace, moisture corrosion...
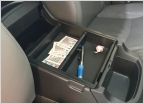 Center console tray and divider for 2003-09 4Runner
 DIY repairs for failed clear coat on roof
 Stuck CV axle shaft, need some help
 OEM Gas cap for 2006 4runner (SR5)
Burning through CV boots
Discussion in '4th Gen 4Runners (2003-2009)' started by Bmxer06pa, Sep 14, 2023.
Page 1 of 2
Page 1 of 2


